What is involved in removing a steering column? Removing a steering column typically involves disconnecting electrical connections, the steering linkage, and fasteners securing it to the vehicle’s frame. This steering column removal guide will walk you through the entire process, from preparation to disassembly, providing detailed instructions and safety tips for a successful steering column disassembly and potential steering column repair or steering column replacement.
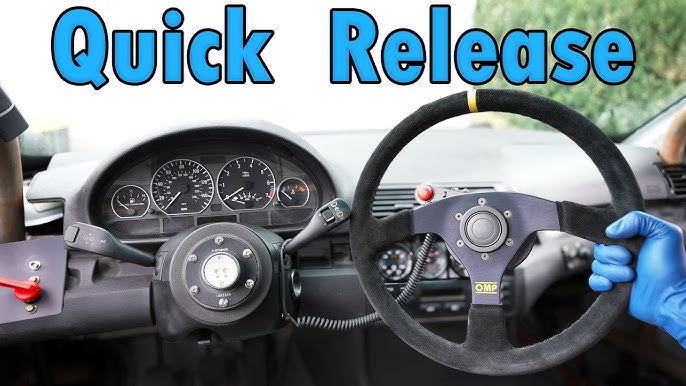
Image Source: i.ytimg.com
Safety First: Preparation is Key
Before diving into any automotive steering repair, safety should be your top priority.
-
Disconnect the Battery: This is the most crucial step. Disconnecting the negative terminal prevents accidental electrical shorts during the process. Locate the negative terminal on your car battery (usually marked with a “-” symbol). Use a wrench to loosen the nut securing the cable and carefully remove the cable. Secure it away from the terminal to avoid accidental contact.
-
Gather Your Tools: Having the right tools at hand will make the job smoother and safer. Here’s a basic list:
- Socket set (metric and SAE)
- Wrenches (metric and SAE)
- Screwdrivers (Phillips head and flathead)
- Steering wheel puller (essential for removing the steering wheel without damage)
- Pliers
- Torx bit set (many steering columns use Torx fasteners)
- Penetrating oil (to loosen stubborn bolts)
- Hammer (use sparingly and with caution)
- Punch or drift pin
- Safety glasses
- Gloves
- Shop towels
-
Review the Vehicle’s Repair Manual: Your vehicle’s repair manual is an invaluable resource. It provides specific instructions, diagrams, and torque specifications for your particular make and model. Consulting the manual can prevent mistakes and ensure proper reassembly.
-
Work in a Safe Environment: Choose a well-lit, clean, and level workspace. Use jack stands to support the vehicle if you need to work underneath it. Ensure adequate ventilation, especially when using penetrating oil or solvents.
Step-by-Step Guide: The Steering Column Removal Process
This section outlines the general process of car steering column removal. Keep in mind that specific steps may vary depending on the vehicle.
1. Removing the Steering Wheel
Removing the steering wheel is usually the first step.
-
Locate the Airbag Module Fasteners: Many modern steering wheels contain an airbag module. Disconnecting the airbag is crucial to prevent accidental deployment, which can cause serious injury. The fasteners are often located on the back of the steering wheel, either behind small access panels or beneath the plastic trim.
-
Disconnect the Airbag: Disconnect the airbag module’s electrical connector. There’s often a retaining clip or lock that needs to be released before the connector can be pulled free. Important: Wait at least 15 minutes after disconnecting the battery before handling the airbag to allow any residual electrical charge to dissipate.
-
Remove the Steering Wheel Retaining Nut: Once the airbag is safely disconnected, remove the large nut in the center of the steering wheel. This nut secures the steering wheel to the steering shaft.
-
Use a Steering Wheel Puller: Attempting to force the steering wheel off the shaft can damage the steering column or the steering wheel itself. Use a steering wheel puller. Attach the puller to the steering wheel using the appropriate bolts. Tighten the puller’s center bolt to gradually pull the steering wheel off the shaft.
Table: Steering Wheel Puller Bolt Sizes (Common)
Bolt Size Common Vehicle Brands M5 Honda, Acura M6 Toyota, Lexus 1/4″-20 Ford, GM -
Mark the Steering Wheel and Shaft: Before completely removing the steering wheel, mark the position of the steering wheel relative to the steering shaft. This ensures proper alignment during reinstallation.
2. Disconnecting the Steering Linkage
Disconnecting the steering linkage is a critical step in car steering column removal. This usually involves accessing the point where the steering shaft connects to the steering gear or rack and pinion.
-
Locate the Steering Shaft Connection: This connection is typically located near the firewall or under the dashboard, where the steering column passes through to the engine compartment.
-
Loosen the Fastener: There’s usually a bolt or clamp that secures the steering shaft to the steering gear or rack and pinion. Loosen this fastener using the appropriate wrench or socket. Penetrating oil can be helpful if the fastener is corroded. Knowing how to disconnect steering shaft properly prevents damage.
-
Separate the Steering Shaft: Once the fastener is loosened, carefully separate the steering shaft from the steering gear or rack and pinion. Be mindful of any seals or bushings that may be present.
-
Support the Steering Gear: After disconnecting the steering shaft, support the steering gear or rack and pinion to prevent it from hanging or putting stress on other components.
3. Removing the Steering Column
With the steering wheel and steering linkage disconnected, you can now remove the steering column itself.
-
Remove Trim Panels: Remove any trim panels or covers that are obstructing access to the steering column mounting bolts. These panels are usually held in place by screws, clips, or snaps.
-
Disconnect Electrical Connectors: The steering column typically has several electrical connectors attached to it. These connectors supply power to the ignition switch, turn signals, windshield wipers, and other components. Carefully disconnect each connector, taking note of its location for reassembly.
-
Remove Mounting Bolts: The steering column is secured to the vehicle’s frame by several mounting bolts. Locate these bolts and remove them using the appropriate socket or wrench. Support the steering column as you remove the last bolt to prevent it from falling.
-
Carefully Lower the Steering Column: Once all the mounting bolts are removed, carefully lower the steering column from its mounting position. Maneuver the column to clear any obstructions and remove it from the vehicle.
4. Steering Column Disassembly (Optional)
If you need to disassemble the steering column for repair or replacement, proceed with caution. Steering column disassembly should only be attempted by those with proper automotive repair skills.
-
Document the Process: Take pictures or videos as you disassemble the steering column to help you remember how everything goes back together.
-
Remove Components: Carefully remove each component of the steering column, such as the ignition switch, turn signal switch, tilt mechanism (if equipped), and any other attached parts.
-
Inspect Components: Inspect each component for wear, damage, or corrosion. Replace any parts that are worn or damaged.
-
Lubricate Moving Parts: Lubricate any moving parts with a suitable grease or lubricant before reassembling the steering column.
Table: Common Steering Column Components
| Component | Function |
|---|---|
| Steering Shaft | Transmits steering input to the wheels |
| Ignition Switch | Controls starting and electrical systems |
| Turn Signal Switch | Controls turn signals and headlights |
| Tilt Mechanism | Allows adjustment of steering wheel angle |
| Lock Cylinder | Secures the steering column and ignition |
| Bearings | Allow smooth rotation of the steering shaft |
5. Steering Column Repair or Replacement
This section focuses on steering column repair.
-
Steering Column Repair: If you’re repairing the steering column, replace any worn or damaged parts. Clean and lubricate all moving parts. Reassemble the steering column, following your disassembly notes and diagrams.
-
Steering Column Replacement: If you’re replacing the steering column, ensure that the new column is compatible with your vehicle. Transfer any necessary components from the old column to the new column.
Reassembly and Final Checks
Reassembly is essentially the reverse of disassembly.
-
Install the Steering Column: Carefully lift the steering column into its mounting position and secure it with the mounting bolts. Torque the bolts to the manufacturer’s specifications.
-
Reconnect Electrical Connectors: Reconnect all electrical connectors to the steering column, ensuring that each connector is properly seated and locked.
-
Reconnect the Steering Linkage: Reconnect the steering shaft to the steering gear or rack and pinion. Tighten the fastener to the manufacturer’s specifications.
-
Install the Steering Wheel: Align the steering wheel with the steering shaft, using the marks you made during disassembly. Install the steering wheel retaining nut and torque it to the manufacturer’s specifications. Reconnect the airbag module.
-
Install Trim Panels: Reinstall any trim panels or covers that you removed during disassembly.
-
Reconnect the Battery: Reconnect the negative terminal to the car battery.
-
Test the System: Start the engine and test the steering system. Check for proper operation of the steering wheel, turn signals, windshield wipers, and other components.
Steering Column Troubleshooting
Here are some common steering column problems and how to address them:
- Loose Steering Wheel: A loose steering wheel can be caused by a loose steering wheel retaining nut, worn steering shaft bearings, or a damaged steering column.
- Stiff Steering: Stiff steering can be caused by a lack of lubrication, a damaged steering gear, or a worn power steering pump (if equipped).
- Play in the Steering: Play in the steering can be caused by worn steering linkage components, loose steering gear adjustments, or a damaged steering column.
- No Start Condition: A no start condition can be caused by a faulty ignition switch or a problem with the immobilizer system.
- Airbag Light On: An airbag light on indicates a problem with the airbag system. This could be caused by a faulty airbag module, a damaged clock spring, or a disconnected electrical connector.
Table: Troubleshooting Steering Column Issues
| Symptom | Possible Causes | Solution |
|---|---|---|
| Loose Steering Wheel | Loose retaining nut, worn bearings | Tighten nut, replace bearings |
| Stiff Steering | Lack of lubrication, damaged steering gear | Lubricate components, repair/replace steering gear |
| Steering Play | Worn linkage, loose adjustments | Replace worn parts, adjust steering gear |
| No Start | Faulty ignition switch | Replace ignition switch |
| Airbag Light | Faulty airbag module, damaged clock spring | Diagnose and repair airbag system (requires specialized knowledge) |
Advanced Techniques
- Clock Spring Replacement: The clock spring is a spiral-wound ribbon cable that allows the steering wheel to rotate while maintaining electrical connections to the airbag, horn, and other steering wheel-mounted controls. Replacing the clock spring can be tricky, as it requires careful alignment to prevent damage. Consult your vehicle’s repair manual for specific instructions.
- Ignition Switch Replacement: Replacing the ignition switch involves disconnecting electrical connectors, removing mounting screws, and carefully extracting the old switch. Ensure that the new switch is properly aligned and secured before reconnecting the electrical connectors.
- Steering Column Bushing Replacement: Over time, the bushings that support the steering column can wear out, causing play and vibration. Replacing these bushings involves disassembling the steering column and pressing out the old bushings. Use a suitable press or bushing driver to install the new bushings.
Frequently Asked Questions (FAQ)
-
Can I remove the steering column myself? Yes, with the right tools, knowledge, and safety precautions, you can remove the steering column yourself. However, it’s a complex procedure, and if you’re not comfortable working on your car’s steering system, it’s best to consult a qualified mechanic.
-
What are the risks of removing the steering column? The risks of removing the steering column include accidental airbag deployment, damage to electrical components, and improper reassembly, which can compromise the safety of your vehicle.
-
How long does it take to remove a steering column? The time required to remove a steering column varies depending on the vehicle and your experience level. It can take anywhere from 2 to 6 hours.
-
How much does it cost to have a mechanic remove a steering column? The cost to have a mechanic remove a steering column can range from $300 to $800, depending on the labor rates in your area and the complexity of the job.
-
What is steering column lock? Steering column lock is a safety feature that prevents the car from being steered without the correct key in the ignition. It typically engages when the key is removed from the ignition switch.
This steering column removal guide offers detailed advice on removing and disassembling a steering column. Following these instructions and always prioritizing safety ensures a successful automotive steering repair project. Remember to consult your vehicle’s repair manual for specific instructions.
Hi, I’m Sean Kernan, the voice behind esteeringwheel.com.. With a passion for all things automotive, I created this platform to share my journey, insights, and expertise about cars. From the latest tech to timeless driving tips, my goal is to help fellow enthusiasts and everyday drivers navigate the fascinating world of automobiles. Welcome to my corner of the road—let’s steer toward knowledge and discovery together!